Best practice for electrodes in titration
Jul 6, 2020
Article
 Share via email
After my earlier blog post on the topic of «Avoiding the most common mistakes in pH measurement», I will now cover the subject of electrodes that are relevant for titration. Here you will not only find out how to select the right electrode for your application – but also how to clean and to maintain it, and most importantly, how you can assure that your electrode is still ok to be used.
The following topics will be covered (click to go directly to the topic):
How to select the right sensor
You might wonder what you need to consider when selecting a suitable sensor for your titration, as a huge variety of different sensors exist. The right sensor needs to be selected based on the type of titration that you want to carry out. For a redox titration, you will need a different sensor than for a complexometric titration.
Furthermore, the sensor selection is highly dependent on matrix, the sample volume, or possible interferences. If you are working in nonaqueous media, you must especially consider any electrostatic effects that might arise. Therefore, I recommend working with an electrode that offers an internal electrical shielding.
The sensor has to show a fast response time and needs to be robust enough for the application, meaning it needs to be resistant to the chemicals used and to the applied cleaning procedure.
Table 1. Overview of suggested sensors for various types of titration
| Type of titration | Possible sensor to use | Remarks |
| Photometric titration | Optrode | No precipitate must be present |
Redox titration | Pt ring electrode | — |
| Au ring electrode | — | |
| Pt Titrode | Maintenance free, pH value must be kept constant | |
| Au Titrode | Maintenance free, pH value must be kept constant | |
| Double Pt sheet electrode | Bivoltammetric / biamperometric titration | |
| Double Au ring electrode | Bivoltammetric / biamperometric titration | |
Precipitation titration | Ag ring electrode | — |
| Ag Titrode | Maintenance free, pH value must be kept constant | |
Complexometric titration | Copper (Cu) ISE | Almost all metal ions |
| Calcium (Ca) ISE | For water hardness | |
Surfactant titration | Ionic surfactant electrode | Aqueous media, titration of anionic surfactants |
| Cationic surfactant electrode | Aqueous media, titration of cationic surfactants | |
| NIO electrode | Aqueous media, titration of non-ionic surfactants or use of STPB as titrant | |
| Surfactrode Refill | Nonaqueous media, pH > 10, no chloroform present | |
| Surfactrode Resistant | Nonaqueous media, pH < 10 | |
| Aqueous acid-base titration | Ecotrode plus | — |
| Nonaqueous acid-base titration | Solvotrode easyClean | — |
For further guidelines regarding how to select the right electrode, either consult our online electrode finder or check out our flyer about «Electrodes in titration» which includes practical tips on care and maintenance.
Maintenance and cleaning
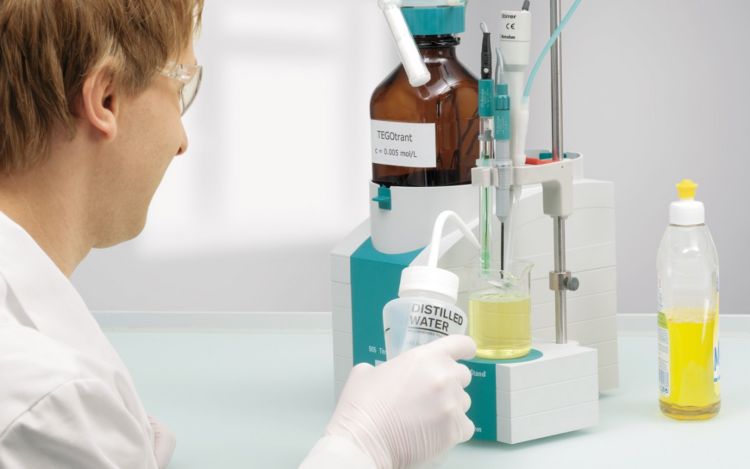
Proper cleaning between your titrations is a key factor for obtaining reliable results. The rinsing step has to assure that neither sample nor titrant contaminates the electrode, leading to carry-over and false results. Therefore, between titrations the electrode (as well as buret tip) has to be rinsed with a suitable solvent, such as deionized water, detergent solution, or any other solvent that removes remaining residues. For nonaqueous titrations, it is furthermore important to condition the glass membrane of the electrode in deionized water after each titration.
Learn more about nonaqueous acid-base titrations in our related blog post.
Nonaqueous acid-base titrations – Common mistakes and how to avoid them

Furthermore, both the reference and measuring electrode require regular maintenance. For the reference electrode, it is very important that it is filled up to the opening with the correct (and uncontaminated) electrolyte. A daily check of the electrolyte level should be performed, and if necessary, the reference electrolyte should be topped up. Always refill the reference electrolyte level up to the filler opening. This assures a proper electrolyte outflow and reduced contamination of the electrolyte.

In addition to the regular refilling, the electrolyte should be replaced at least on a monthly basis to guarantee a clean electrolyte with the correct concentration (e.g., evaporation of water can increase the concentration of the electrolyte). Usage of old or contaminated electrolyte leads to an undesired change in the measured potential.
Also ensure that the diaphragm is clean, otherwise you might experience a blockage, leading to an unstable potential caused by the missing contact between electrolyte and sample. Figure 2 shows an example of a contaminated diaphragm.
Table 2 suggests some possible cleaning agents to remove sticky substances from the diaphragm. After cleaning the diaphragm, always replace the electrolyte.
Table 2. Common electrode contaminants and suggested cleaning agents for each situation. Contact your local Metrohm representative for further questions.
| Contaminant | Suggested cleaning agent |
|---|---|
| Silver sulfide | 7% thiourea in c(HCl) = 0.1 mol/L |
| Chloride | diluted ammonium hydroxide solution |
| Proteins | 5% pepsin in c(HCl) = 0.1 mol/L |
The measuring electrode needs a thorough cleaning at least weekly. Uncoated metal ring or ISE electrodes require regular polishing to maintain a quick response. Glass membranes or polymer membranes must not be polished or cleaned with abrasives. If the electrode is used in oily or sticky samples, degreasing or removing proteins might be necessary by using a suitable solvent.

Another important point to consider is the right storage for your electrode. Incorrect storage reduces the lifetime of an electrode, and therefore it needs replacement more frequently. Unfortunately, there is not one single storage solution which covers all electrode types. The right storage solution highly depends upon the electrode type.
If it is a separate indicator or only a reference electrode, then it is much easier to determine the correct storage solution, as the perfect solution for only one part must be found. For combined electrodes, the situation is a bit more complicated. Combined electrodes contain a reference electrode and a measuring electrode that each have different preferences. Therefore, sometimes a compromise is necessary. The reference electrode prefers to be stored in reference electrolyte to remain ready to use, whereas an indicator glass membrane prefers deionized water. On the other hand, a metal indicator electrode prefers to be stored dry.
For combined pH electrodes with c(KCl) = 3 mol/L as reference electrolyte, a special storage solution was developed by Metrohm which maintains the glass membrane as quickly as possible without impairing the performance of the reference system. All other pH electrodes are stored in their respective reference electrolyte (normally indicated on the head of the electrode, see Figure 3).
Metal electrodes are also stored differently, depending on the type. Combined metal ring electrodes are stored in reference electrolyte to maintain the diaphragm properly, whereas Titrodes are stored in deionized water, as these electrodes contain a pH glass membrane that needs to be kept hydrated. Always fill the storage vessel of your electrode with approximately 1–2 mL of storage solution and exchange it regularly as it might be contaminated by sample or cleaning solution.
Table 3 shows typical storage conditions depending on the type of the electrode.

If you are not sure how to store your electrode correctly, check the information in our free electrode flyer below or on our website.
Flyer: Electrodes in titration
Check your electrode
The easiest way to check the performance of your electrode is to monitor it during a standardized titration (e.g., titer determination) which is performed regularly (e.g., weekly) and where prerequisites such as sample size, concentration of titrant, and volume of added water are always very similar. Otherwise, you can also follow a procedure recommended by Metrohm.
To check metal electrodes, you can find a test procedure in the Application Bulletin below.
Check of Silver, Platinum and Gold electrodes
For information about checking surfactant electrodes, download the following Application Bulletin.
Check of surfactant electrodes
A check procedure for ion-selective electrodes is given in the ISE manual below.
Leaflet: Manual for ion-selective electrodes
As an example, I will explain the test procedure of a silver electrode a bit more in detail. Silver electrodes can easily be checked by a standardized titration using hydrochloric acid (c(HCl) = 0.1 mol/L) as sample, and silver nitrate (c(AgNO3) = 0.1 mol/L) as titrant. Perform a threefold determination with the recommended titration parameters and sample size.
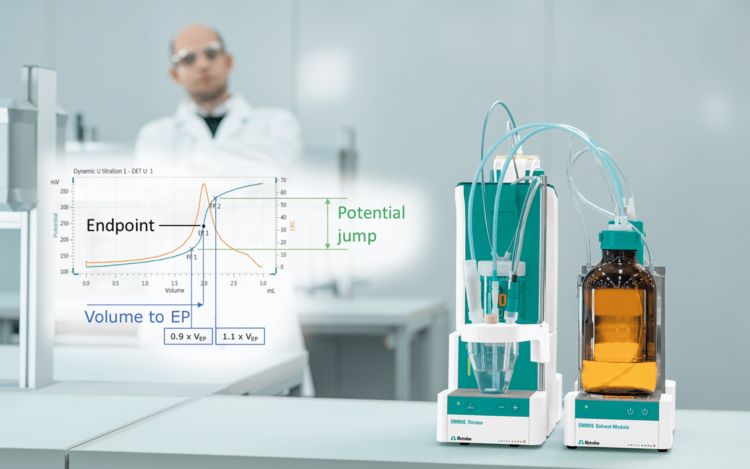
The following parameters are evaluated and compared to optimal values:
- added volume of titrant at equivalence point (EP)
- time until equivalence point is reached
- potential jump (potential difference) between the potential measured at 90% and 110% of the EP volume

If the evaluated data cannot meet the specified values, clean the electrode thoroughly and repeat the test. If no improvement is observed, the sensor must be replaced.
Further symptoms can indicate a necessary replacement: sluggish response, unstable or drifting signal, longer duration of titration, smaller potential jumps, and worse shape of the titration curve.
In Figure 5 below, two different titration curves for calcium and magnesium in water are shown using a combined Calcium ISE. The upper curve is obtained with a new Ca-ISE; the titration is fast and you will obtain two equivalence points: one each for calcium and magnesium. In the lower curve, an old electrode was used. The titration takes much longer and the second equivalence point for magnesium cannot be recognized anymore due to the lack of sensitivity of the electrode.

To summarize
- Select the right indication for your titration type.
- The quality of the electrode highly influences the quality of your titration results.
- Proper maintenance and storage can increase the lifetime of the electrode.
- Check the electrode performance regularly or monitor the titration performance (duration, potential jump) over time to reduce downtime of your instrumentation.
Your knowledge take-aways
On-demand webinar: Avoid titration mistakes through best practice sensor handling
Basics of potentiometry

The present article addresses the theory, practical aspects and troubleshooting of potentiometry.