Del artikel
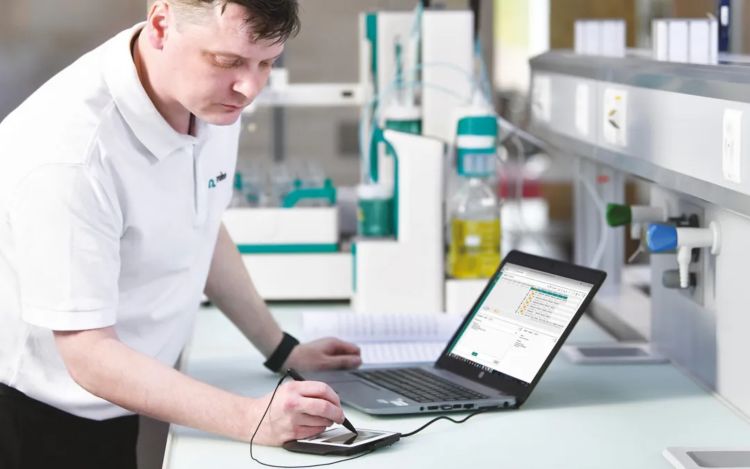
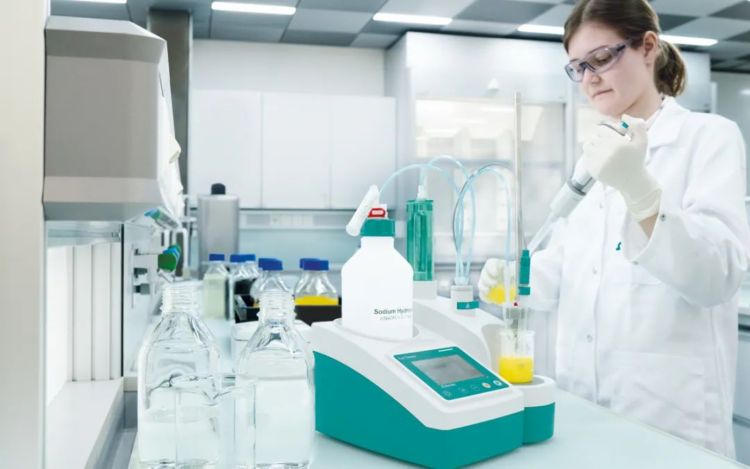
The Eco Titrator is a cost-effective solution suitable for all types of potentiometric titrations. It features a touch display and dedicated keys to control stirrer speed. A USB port allows the instrument to connect to a printer or flash drive to document results, supporting GLP and GMP compliance.

How to transfer manual titration to autotitration
11. maj 2026
Artikel
Manual titration is a common analysis method in many labs. However, it has several drawbacks, such as subjective endpoint detection, risk for manual errors, or lack of data integrity. In this article, learn the most important steps to consider when converting manual titration to automatic titration, from the choice of the titrator to the optimization of the method itself.
To jump directly to a topic, click on the link below:
Disadvantages of manual titration
Manual titration involves adding titrant dropwise from a buret to a sample solution. Endpoint detection is typically done visually (by eye) using color indicators. This analytical method remains widely used because it requires only a glass buret and a flask. However, it comes with several notable disadvantages.
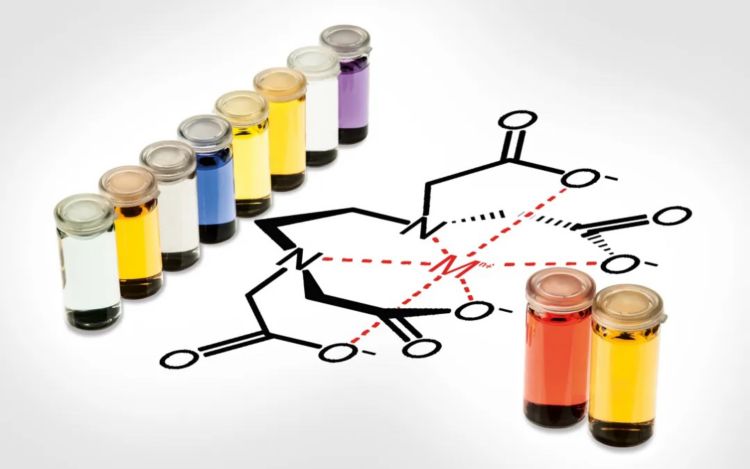
- Subjective endpoint detection: Visual recognition of the color change depends on individual perception. Each person may interpret color intensity differently, which leads to inconsistent results. This issue becomes more pronounced when working with colored or turbid solutions.
- Drop size accuracy: The precision of the analysis is influenced by the size of each drop. For instance, if the drop size is 50 µL and the total titrant volume is 5 mL, a single drop can cause a variation of approximately 1%.
- Time-consuming process: Manual titration takes considerable time. This includes not only the titration itself, but also cleaning and refilling the buret and manually calculating the results. These steps limit the number of samples that can be processed during a shift.
- Data integrity risks: When performing manual titrations, results are often recorded by hand, transferred to spreadsheets, and then manually entered into a LIMS. Each step introduces potential for human error and requires thorough quality control checks. This process is both tedious and inefficient.
Using an automatic titrator (autotitrator) helps operators to overcome these limitations.
What is autotitration?
Autotitration refers to the automation of one or more steps in the titration process. There are three levels of automation, depending on the setup.
- Partial automation: Only a single step is automated. For example, an electrode is used for objective endpoint recognition, or the titrant is added manually using a more precise dosing device.
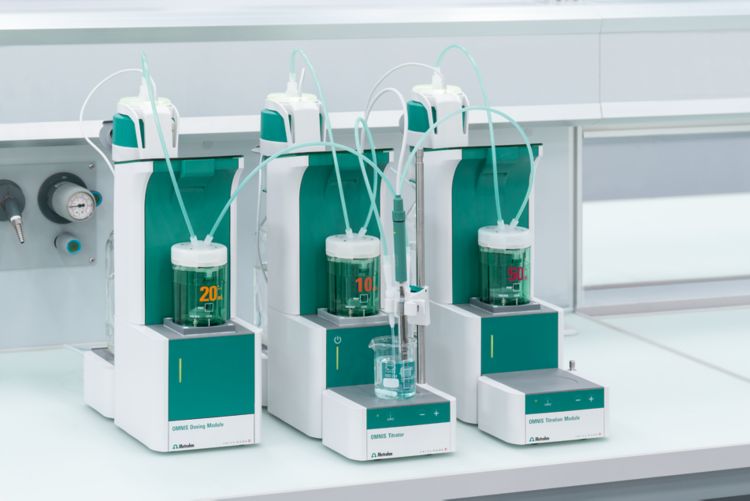
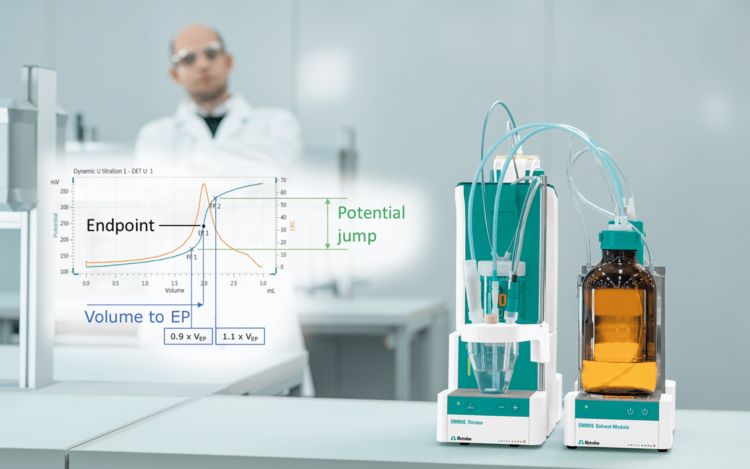
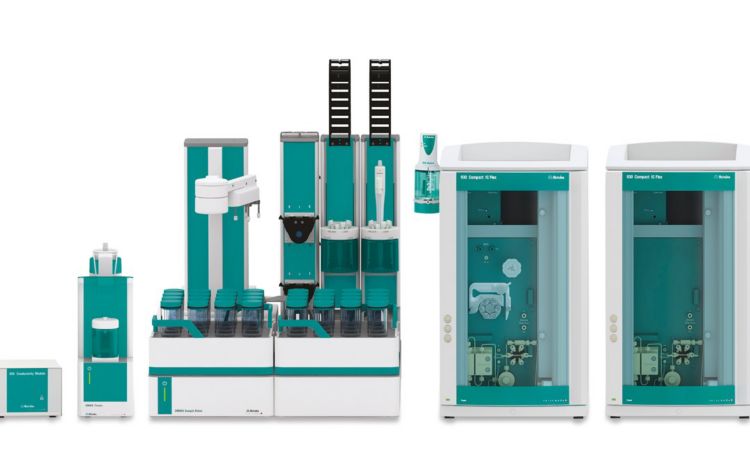
Metrohm offers partial automation within the OMNIS platform, allowing full traceability for manual titrations. - Stand-alone automation: A titrator performs the entire titration, including titrant addition, endpoint detection, and result calculation. The operator is still responsible for preparing the sample and cleaning the equipment afterwards. Figure 1 shows a stand-alone titrator.
- Fully automated titration: The titrator is combined with an autosampler, allowing full automation of the titration including sample preparation and equipment cleaning. This setup enables the operator to focus on other tasks and significantly reduces human error.
Learn more about what can be automated in the blog post «Why consider automation – even for simple titrations» and how automation can benefit you in the blog post «Save money by using automated titration systems».
, titration stand with integrated stirrer (2), electrode (3) for endpoint detection, and display (4) for control and results.")
Figure 1.
Stand-alone automatic titrator with piston buret (1), titration stand with integrated stirrer (2), electrode (3) for endpoint detection, and display (4) for control and results.
Automated titration offers several advantages. Table 1 provides a comparison between manual and automatic titration.
| Parameter | Manual titration | Automatic titration |
|---|---|---|
| Titrant addition | Manually | Automatically with piston buret |
| Dosing accuracy | 50 µL (50 mL buret class AS) 20 µL (10 mL buret class AS) | 25 µL (50 mL buret) 7 µL (10 mL buret) |
| Endpoint detection | Visually by eye | Using a sensor and mathematical algorithm |
| Control | Manually by operator | Integrated touch display or with software |
| Calculation | Manually by operator | Integrated in system or with software |
| Data integrity | No | Yes (optional) |
| Automation possibility | No | Yes |
Choice of titrator
When choosing a titrator, you should take several key points into account.
- GLP/GMP compliance: Autotitrators must be able to document results. This includes providing options for a printer connection or digital storage (e.g., USB flash drive). All Metrohm titrators meet GLP and GMP requirements.
- FDA compliance: In regulated environments, titrators must comply with FDA Regulation 21 CFR Part 11.
- Control options: Titrators can be controlled either via software or an integrated touch display.
- Sample throughput: If a high number of samples are analyzed daily, an automated system can significantly improve laboratory efficiency. Learn more about automation in the article «Why consider automation – even for simple titrations».
- Flexibility for different titrations: Switching between titration types, for example from redox to acid-base titration, requires changing both titrant and electrode. Not all titrators support this. Efficiency improves with titration systems that can be extended with additional burets and electrodes.
Metrohm offers several titrator models with different capabilities. Table 2 provides a comparison of the key points mentioned above for each titrator family.
| Parameter | Eco Titrator | Ti-Touch | OMNIS Titrator |
|---|---|---|---|
| GLP/GMP compliance | Yes | Yes | Yes |
| FDA compliance | No | Yes | Yes |
| Control option | Touch display | Touch display | Software |
| Automation possibility | Yes (max. 9 samples) | Yes (max. 24 samples) | Yes (max. 175 samples, parallel titrations) |
| Extension for different titrations | No | Limited (two sequential titrations) | Extensive (up to five titrations in parallel) |


Choice of sensor

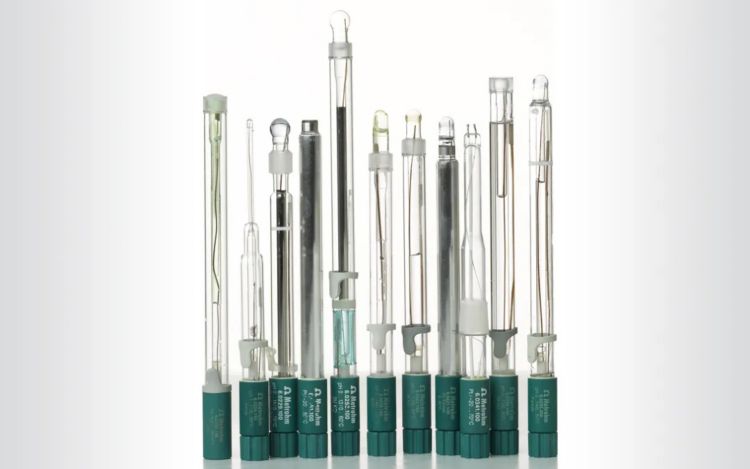
Figure 2.
Optrode M2, optical sensor for photometric titrations.
The most crucial step in transferring a manual titration to automatic titration is selecting the appropriate sensor for detecting the equivalence point.
A straightforward option is to use a photometric sensor, which effectively replaces the human eye. This approach is particularly useful when norms or standards specify the use of color indicators. Figure 2 shows an optical sensor for photometric titrations.
Using a potentiometric electrode is often simpler, as it does not require an indicator solution. However, selecting the correct electrode depends on several factors.
- Chemical reaction: The chemical reaction determines the choice of electrode. For example, acid-base titrations require a pH electrode, while redox titrations require a metal electrode.
- Sample matrix: The sample matrix can significantly affect the electrode performance. For example, protein-containing samples (e.g., dairy products) require a pH electrode with a diaphragm that is insensitive to proteins.
- Sample volume: For small sample volumes, specialized micro electrodes are recommended.
More information about different electrodes for various titration types is available in the article «Best practice for electrodes in titration».
The flyer «Electrodes for titration» offers guidance on selecting the most suitable electrode. Alternatively, the Electrode Finder allows filtering by the reaction type, application area, or specific details, such as sample matrix.
Optimizing the sample size and solution volumes
When performing manual titrations, reaching the endpoint often requires 30 mL or even 40 mL of titrant. Autotitrators, which have a higher dosing accuracy, are typically equipped with 10 mL or 20 mL burets. Because refilling the buret during titration causes errors, the sample size should be adjusted for automatic titrations.
For automatic titrators, it is generally recommended that the equivalence point (or expected endpoint volume) should lie between 10% and 90% of the total buret volume. Therefore, a critical step when transferring manual titration to autotitration is the optimization of the sample size. The lower titrant consumption can also save costs.
For example, in the assay of calcium hydroxide, the sample size can be reduced from 1.5 g to 0.375 g. This adjustment decreases the titrant consumption by 30 mL per titration [1]. With an estimated 10 titrations per day, this results in annual savings of approximately €4700 per year on titrant alone. See Table 3 for a detailed example calculation.
| Manual titration | Automatic titration | |
|---|---|---|
| Titrant | 0.05 mol/L EDTA | 0.05 mol/L EDTA |
| Costs of titrant | €43.40 per liter * | €43.40 per liter * |
| Sample size | 1.5 g | 0.375 g |
| Expected endpoint volume | 40 mL | 10 mL |
| Estimated titrations per day | 10 | 10 |
| Costs of titrant per year | €6336.40 | €1584.10 |
| Cost savings | €4752.30 |
* (https://www.sigmaaldrich.com/DE/de/product/mm/160320, April 23, 2026 for Germany)

Figure 3.
For accurate pH measurements, both the glass membrane and diaphragm must be immersed in titration solution.
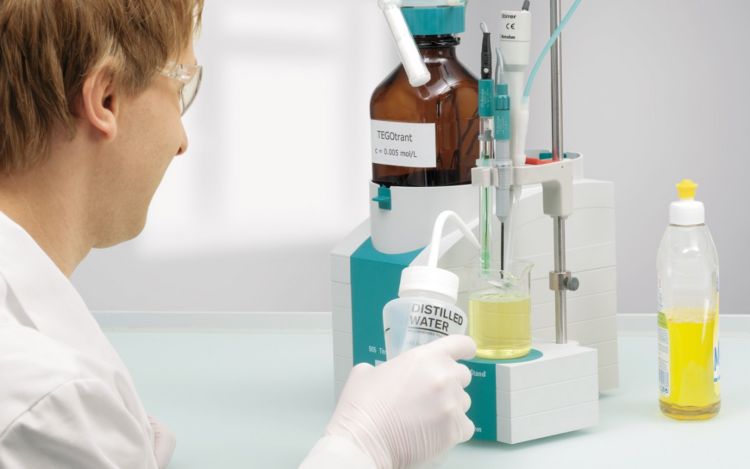
In addition to adjusting the sample size, it might be necessary to modify the amount of diluent (water or solvent) used in the analysis. Accurate results depend on full immersion of the relevant parts of the sensor in the solution. For example, with a pH electrode, both the glass membrane (for measurement) and diaphragm (for reference) must be fully immersed, as shown in Figure 3.
Selecting the right titration mode
Some titration reactions are reversible, e.g., acid-base titrations, while others are irreversible, e.g., redox titrations. The speed of the titration reaction can also vary. Therefore, autotitrators are equipped with different titration modes.
There are three commonly used titration modes:
- Endpoint titration: Titrant is added until a predefined endpoint is reached. This mode is commonly used with a specific pH value as the endpoint.
- Monotonic titration: A constant volume of titrant is added with each dosing step.
- Dynamic titration: The volume of titrant added varies depending on the proximity to the equivalence point. Smaller titrant volumes are added incrementally around the equivalence point.
This video explains the difference between monotonic and dynamic titration in more detail.
Dynamic mode is recommended for fast titrations, such as acid-base titrations. Monotonic mode is more suitable for slower titrations where the equivalence point is reached abruptly, such as in vitamin C determination, as the dynamic mode would overshoot such equivalence points.
Optimizing the titration setup and method
Optimizing the titration setup and method helps to improve accuracy, speed up the titration, and reduce titrant consumption.

Figure 4.
Electrode placement relative to stirring direction. Left: downstream of the buret tip, resulting in inaccurate readings. Right: upstream of the buret tip, allowing titrant to react with analyte before reaching the electrode.
Stirrer setup for higher accuracy
Both stirring speed and sensor placement within the titration beaker directly affect the accuracy of the results. The following points should be considered:
- Select a stirring speed that ensures thorough mixing without splashing. The optimal speed depends on the sample beaker and stirrer type.
- Avoid creating a vortex which can leave the electrode hanging in the air and decrease accuracy.
- Position the electrode close to the beaker wall and upstream of the buret tip, as illustrated in Figure 4. This setup promotes effective mixing of the titrant with the sample and improves accuracy.
Start volume to speed up the titration
To speed up titrations – especially monotonic titrations – a start volume can be used. This approach resembles the pre-dosing of titrant in manual titration. A pause step should follow the addition of the start volume to allow the titrant to react with the analyte before the titration begins.
Stop volume to save titrant
Applying a stop criterion helps to reduce titrant consumption and minimize waste. The simplest option is a fixed stop volume. This is effective when the equivalence point consistently occurs around the same volume.
For samples with varying analyte concentrations, a more flexible solution is required. In such cases, the maximum number of equivalence points is used as the stop criterion. Additionally, a defined volume should be added afterwards.
In both cases, a stop volume of approximately 1 mL after the equivalence point is recommended.
Validation of the method
The final step in converting manual titration to automatic titration is method validation – especially important in regulated environments. The validation of a titration method includes standardization of the titrant as well as determination of accuracy and precision, linearity, and specificity. For more information about the validation of titration methods, read our blog post «Validation of titration methods».
Conclusion
When transitioning from manual to autotitration, laboratories should consider several key factors. At the same time, this change provides an opportunity to optimize the titration process and reduce waste. The infographic in Figure 5 summarizes the essential steps involved in method transfer:

Figure 5.
Summary of key steps for transferring manual titration to autotitration.
- Select a titrator based on requirements regarding compliance, instrument control, sample throughput, and reaction type.
- Choose a sensor suitable for the titration reaction, sample matrix, and sample volume.
- Adjust the sample size so that the equivalence point lies between 10% and 90% of the buret volume. If necessary, modify the diluent volume to ensure that the sensor is fully immersed.
- Select the titration mode based on the titration reaction. Dynamic mode is recommended for fast titrations. Monotonic mode is better suited for slower titrations where the equivalence point is reached abruptly.
- Optimize the titration by placing the electrode upstream of the buret tip, selecting a stirring speed that does not lead to vortex formation, and defining start and stop volumes.
- Validate the method to ensure reproducibility and reliability.
Detailed examples for steps 2 to 5 are provided in White Paper WP-063 «Recommendations for converting a manual titration procedure into an automated titration procedure».
For more information, watch our webinar «How to convert from manual to automatic titrations».
Reference
[1] Marques, M. R. C.; Pappa, H.; Chang, M.; Spafford, L.; Klein, M.; Meier, L. Recommendations for Converting a Manual Titration Procedure into an Automated Titration Procedure; White Paper WP-063; Metrohm: Herisau, 2021.
Additional resources
Monograph: Practical aspects of modern titration
Blog post: Recognition of endpoints (EP)
Blog post: How to avoid titration errors in your lab
Blog post: Why consider automation – even for simple titrations
Blog post: Validation of titration methods
Blog post: Lab of the future: Automated robotic analysis of petroleum products
On-demand webinar: How to convert from manual to automatic titrations
Recommendations for converting a manual titration procedure into an automated titration procedure

We have compiled a comprehensive White Paper and several application documents that address typical questions that arise with the change from manual to automated titration. This White Paper is intended to help follow the recommendations by USP.
Author